
 Save
Save
This homemade strawberry mochi recipe brings the delightful Japanese treat right to your kitchen. The sweet strawberry flavor wrapped in a chewy, soft rice cake creates a perfectly balanced dessert that looks as beautiful as it tastes.
I first made these strawberry mochi for my daughter's birthday party when she requested something different from typical cake. The pink color and sweet strawberry filling were such a hit that they've become our signature dessert for special occasions.
Ingredients
- Glutinous rice flour: Forms the chewy outer layer. Look for packages specifically labeled glutinous or sweet rice flour
- Cornstarch: Prevents sticking and helps create the perfect texture
- Sugar: Sweetens the dough just enough without overpowering the filling
- Plant based milk: Adds moisture and helps create a smooth dough
- Strawberry food coloring: Creates that signature pink color. Use natural food coloring if preferred
- Vegan butter: Adds richness to the dough and improves mouthfeel
- Coconut cream: Provides structure to the filling while keeping it dairy free
- Heavy cream: Whips into the perfect consistency. Use coconut whipping cream for a fully vegan version
- Sweetened condensed coconut milk: Adds concentrated sweetness to the filling
- Strawberry puree: Brings fresh berry flavor. Use ripe seasonal berries for best flavor
Step-by-Step Instructions
- Create the mochi dough:
- Combine glutinous rice flour, sugar, plant based milk, and food coloring in a microwave safe bowl. Mix thoroughly until you have a smooth, lump free batter. The consistency should be similar to pancake batter but slightly thicker. Cover the bowl with plastic wrap or a microwave safe lid with a vent.
- Microwave the dough:
- Place the covered bowl in the microwave and heat for 20 minutes, stopping every 5 minutes to stir the mixture thoroughly. This ensures even cooking. The dough is ready when it becomes translucent and very sticky. Be careful as the bowl and dough will be extremely hot.
- Incorporate butter:
- Add the softened vegan butter to the hot dough and mix vigorously until completely incorporated. This adds richness and helps prevent the mochi from hardening too quickly when cooled.
- Knead and rest dough:
- Transfer the dough to a surface lightly dusted with rice flour and knead until smooth and stretchy, about 2 minutes. The dough should feel elastic but not stick excessively to your hands. Let it cool for 45 minutes at room temperature, covered with a damp cloth to prevent drying.
- Prepare strawberry filling:
- In a medium bowl, combine the coconut cream, heavy cream, sweetened condensed coconut milk, and strawberry puree. Whip the mixture with an electric mixer until stiff peaks form, about 3 minutes. The filling should hold its shape when scooped.
- Shape the mochi:
- Divide the dough into equal portions, rolling each into a ball. Flatten each ball into a 3 inch disk, making the edges thinner than the center. Place a tablespoon of filling in the center of each disk.
- Seal the mochi:
- Carefully bring the edges of the dough up around the filling, pinching firmly to seal completely. Roll the filled mochi gently between your palms to create a smooth, round shape.
- Apply finishing touches:
- Tap the bottom of each completed mochi in a small bowl of cornstarch to prevent sticking. Gently brush off any excess flour with a pastry brush for a clean appearance.
 Save
Save
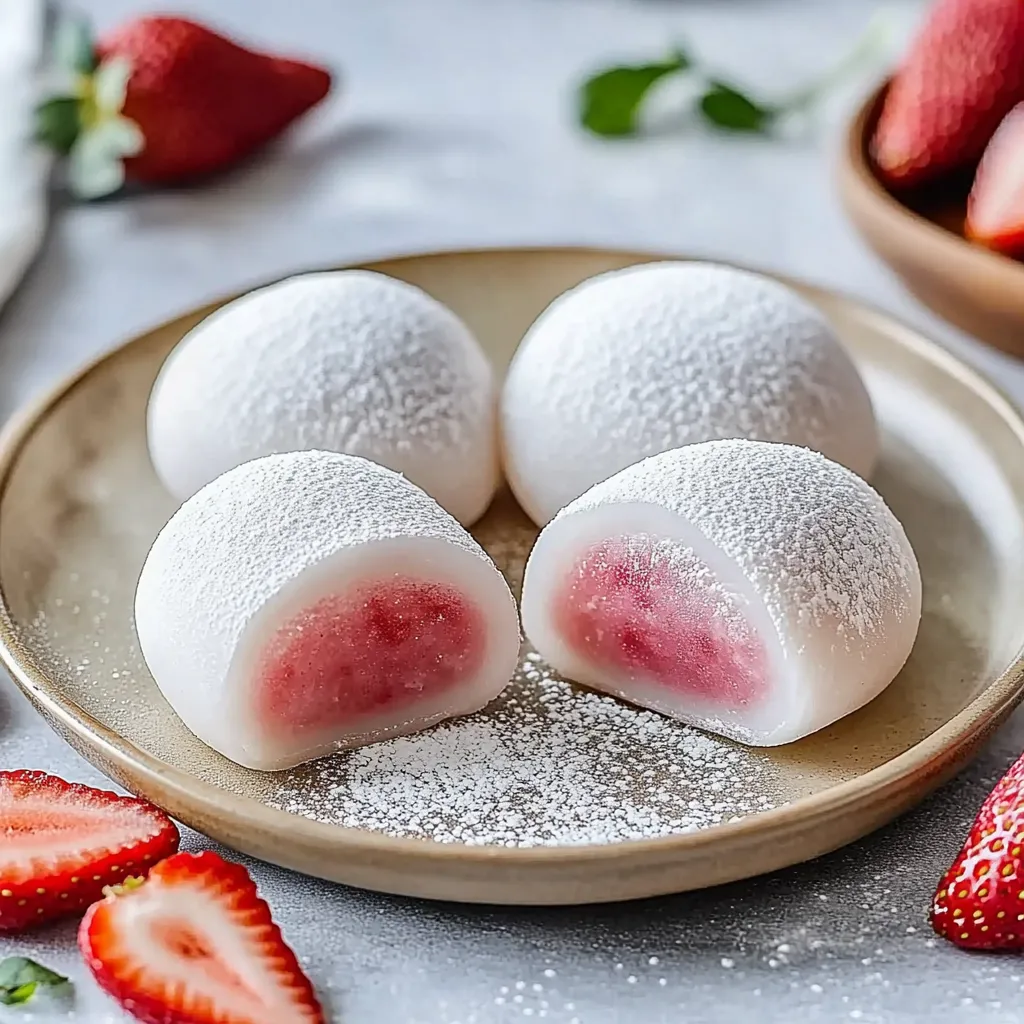
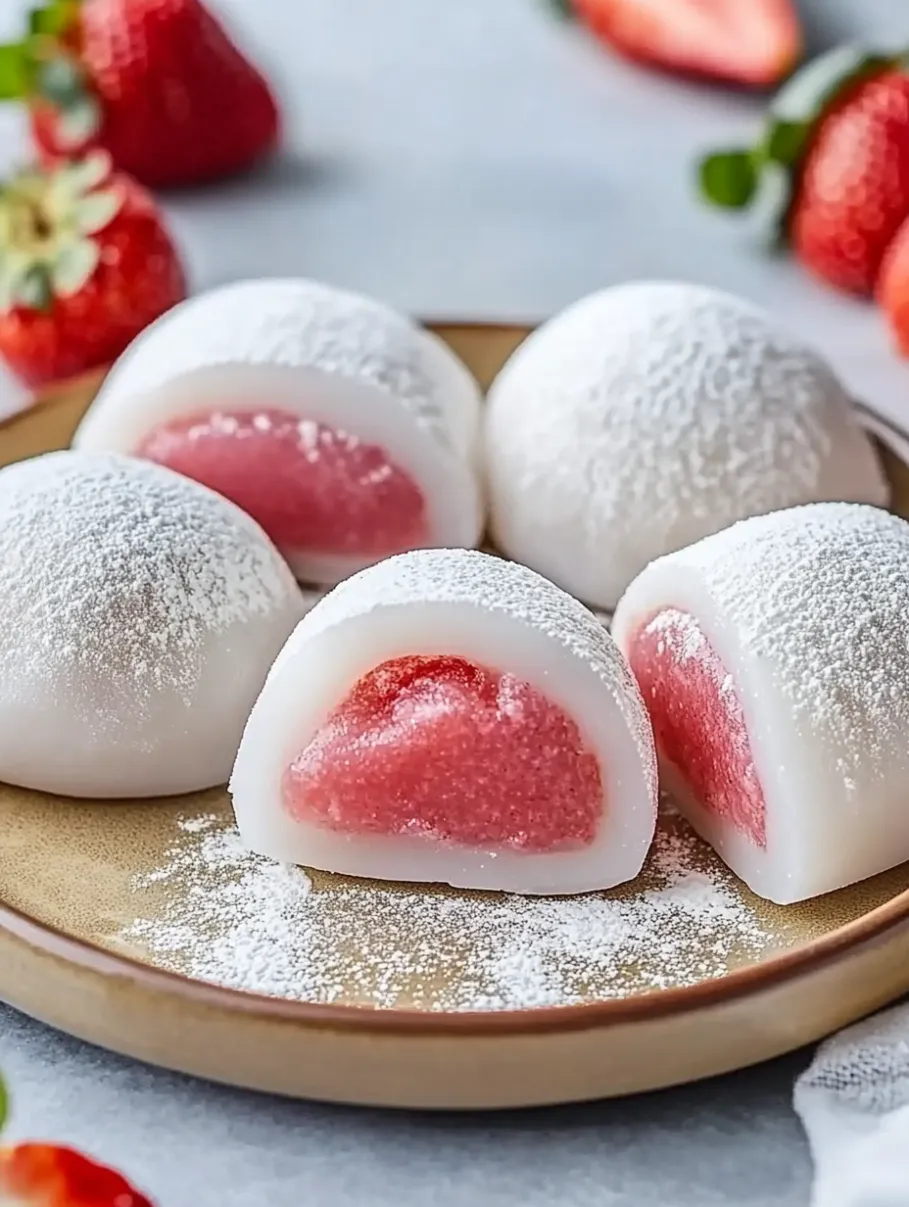
The glutinous rice flour is truly the star ingredient here. Despite its name, it contains no gluten and creates that distinctive chewy texture that makes mochi so uniquely satisfying. My grandmother taught me that the key to perfect mochi is in the kneading process to develop the right elasticity.
Storage Tips
Strawberry mochi tastes best when enjoyed within 24 hours of making, but proper storage can extend their freshness. Place mochi in an airtight container with a sheet of parchment paper between layers to prevent sticking. Store at room temperature for up to 2 days or refrigerate for up to 4 days. The texture will become slightly firmer when chilled, so bring to room temperature for 15 minutes before serving for the best eating experience.
Flavor Variations
This versatile recipe can be adapted to create different flavor profiles. Replace strawberry puree with mango, matcha, chocolate, or red bean paste for traditional Japanese flavors. You can also experiment with the outer dough by adding matcha powder, cocoa powder, or fruit powders for natural coloring and flavor. For a more decadent dessert, try filling with ice cream instead of the cream filling, freezing the completed mochi for a refreshing frozen treat.
Troubleshooting Tips
Working with mochi dough can be tricky for beginners. If your dough becomes too sticky during shaping, dust your hands with additional cornstarch. If the dough tears easily, it may need more kneading to develop elasticity. For filling that leaks out, ensure you're using enough dough per piece and pinch the seams very firmly. Remember that mochi dough hardens as it cools, so work relatively quickly when shaping, or keep unused portions covered with a damp cloth.
Frequently Asked Questions About Recipes
- → What makes strawberry mochi unique?
Strawberry mochi combines a soft and chewy rice flour dough with a creamy, sweet strawberry filling for a delightful blend of textures and flavors.
- → What type of milk can I use for the dough?
You can use plant-based milk like almond, oat, or soy milk to prepare the mochi dough.
- → How do I achieve the soft texture of the dough?
Microwaving the dough until translucent and kneading it with softened vegan butter helps create the soft and stretchy texture characteristic of mochi.
- → Can I substitute the filling ingredients?
Yes, you can substitute coconut cream and heavy cream with other dairy or non-dairy alternatives, and use different fruit purees for flavor variations.
- → How should I store finished mochi?
Store mochi in an airtight container at room temperature for a day, or in the refrigerator for up to 2–3 days. Allow refrigerated mochi to come to room temperature before serving.