
 Save
Save
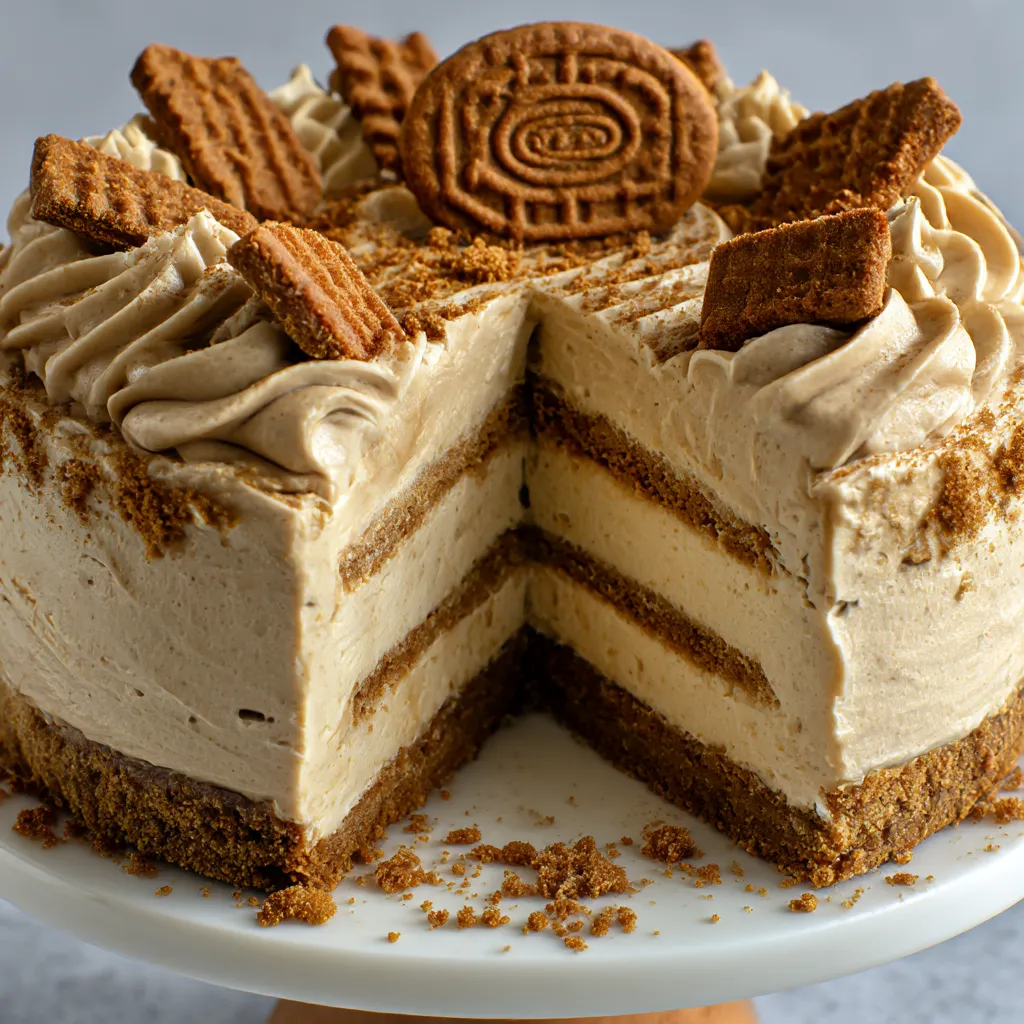
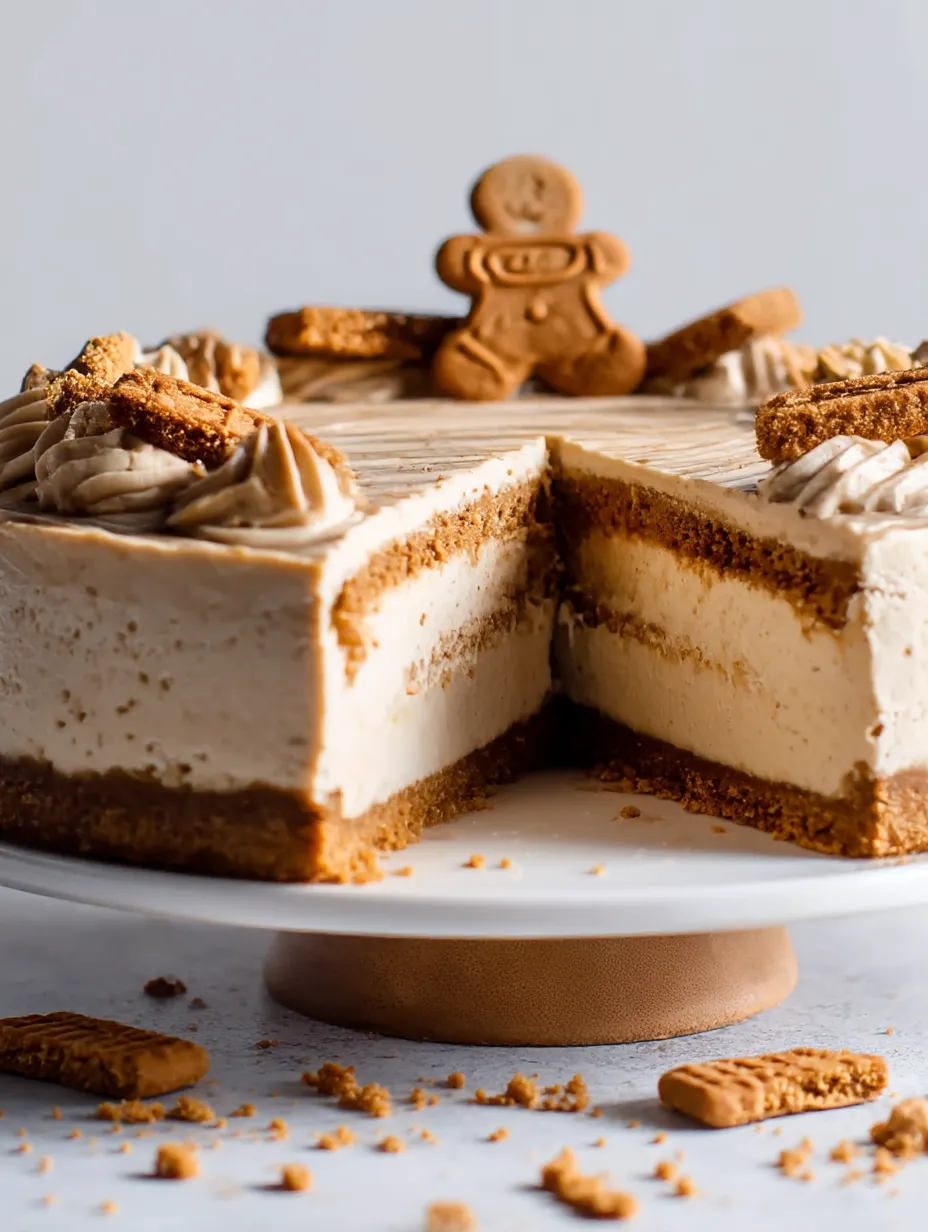
No bake Biscoff cheesecake brings all the creamy richness of a classic cheesecake without the fuss of baking or water baths. This version has two layers of crunchy Biscoff cookie crust and a thick, airy filling mixed in a single bowl. The best part is that everything can be made ahead so it is perfect for gatherings or when you want a low stress dessert.
I first made this after a broken oven spoiled my baking plans. The results had everyone asking for seconds and now it makes an appearance at every holiday.
Ingredients
- Biscoff cookie crumbs: bring deep caramel notes and dramatic crunch use fresh cookies for best taste
- Brown sugar: intensifies sweetness and helps the crust hold together choose light or dark for subtle flavor differences
- Unsalted butter melted: forms the crust and adds richness choose high quality for best results
- Cream cheese: for a silky base let it soften on the counter before using for smooth mixing
- Powdered sugar: blends easily without grittiness sift it for an extra smooth filling
- Biscoff creamy cookie butter: turns the whole dessert into pure Biscoff bliss make sure you buy the creamy version for easy mixing
- Pure vanilla extract: lifts flavors always choose real extract not imitation
- Heavy whipping cream: creates airy structure keep it very cold for best results
- Extra Biscoff cookie butter and crushed cookies: finish the top for eye catching taste use extra cookies for garnish if desired
Step-by-Step Instructions
- Prepare the Pan:
- Line the bottom of a nine inch springform pan with parchment paper This prevents sticking and makes serving easy
- Mix the Biscoff Cookie Crust:
- Use a medium bowl to mix the Biscoff crumbs brown sugar and melted butter Stir until evenly moistened The texture should feel like damp sand
- Form the Crust Base:
- Press two thirds of the crumb mixture firmly into the bottom and most of the way up the sides of the pan Use the flat bottom of a cup to pack it tightly Chill this in the fridge to help the crust set and keep the rest of the crumb mixture at room temperature for the next layer
- Whip the Cheesecake Filling:
- Place softened cream cheese and powdered sugar in a large bowl Use an electric mixer fitted with a paddle attachment to blend on low until the sugar is fully dissolved Scrape your bowl and add Biscoff cookie butter and vanilla Mix until totally smooth
- Incorporate the Cream:
- Keep your heavy cream ice cold Slowly drizzle the cream into the mixture with the mixer on low scraping the bowl as needed This gradual mixing is key for a light texture
- Whip to Stiff Peaks:
- Once all cream is in boost the mixer to high Beat until fluffy and thick The mixture should form ripples and not sink if you drop a spoonful back in This takes two to three minutes Do not overmix or the texture can get grainy
- Layer the Cheesecake:
- Spread half the filling over the chilled crust gently Evenly sprinkle the reserved crumb mixture over the filling Add the rest of the filling and smooth the top taking care not to disturb the center cookie layer
- Chill to Set:
- Cover your pan and refrigerate at least six hours or overnight This sets the texture and flavors
- Add Toppings and Serve:
- Melt Biscoff cookie butter until it is pourable Pour and spread over the chilled cheesecake Sprinkle with extra crushed cookies if wanted Unlatch and transfer to a plate then slice to serve
 Save
Save
One of my favorite moments was seeing my friends try to guess what made this cheesecake so special Everyone lights up when they taste the Biscoff and it always sparks fun conversations about favorite treats
Storage Tips
Cover the cheesecake tightly with plastic wrap or place in an airtight container Store in the refrigerator for up to five days For longer storage slices can be frozen individually then wrapped and stored for up to one month Simply thaw in the fridge before serving to maintain texture
Ingredient Substitutions
No Biscoff cookies Try speculoos or other caramelized cookies For a gluten free option use a compatible crumb cookie Cream cheese can be swapped for brick style neufchatel cheese for a lighter taste but always avoid whipped style or anything in a tub
Serving Suggestions
Serve slices chilled for clean edges Pair with hot coffee or black tea for a cozy afternoon snack For a café style finish top with extra cookie crumbs a sprinkle of cinnamon or a delicate dollop of whipped cream
Cultural Context
Biscoff cookies have roots in Belgium where they are often served with coffee Turning them into a no bake cheesecake highlights their caramel butter flavor and brings coffeehouse nostalgia straight to your kitchen This cheesecake combines American style creaminess with classic European cookies
Frequently Asked Questions About Recipes
- → What creates the signature flavor in this cheesecake?
The unique caramelized taste comes from Biscoff cookie crumbs and cookie butter used in both the crust and filling, giving a spiced, buttery richness to every bite.
- → How do I get a smooth, creamy filling?
Beat cream cheese with powdered sugar until smooth before adding cookie butter and cold heavy cream slowly. Proper mixing ensures a light, silky texture and prevents lumps.
- → Why does the crust have two layers?
Dividing the crust mixture adds a crunchy cookie layer in the middle, giving textural contrast to the creamy filling and boosting the cookie flavor.
- → How long should this cheesecake chill?
For best results, let it chill in the refrigerator for at least 6 hours or overnight to ensure it fully sets and slices cleanly.
- → Can I prepare toppings in advance?
Yes! Melt the cookie butter just before serving and crush Biscoff cookies in advance so you can garnish quickly once the cheesecake sets.