
 Save
Save
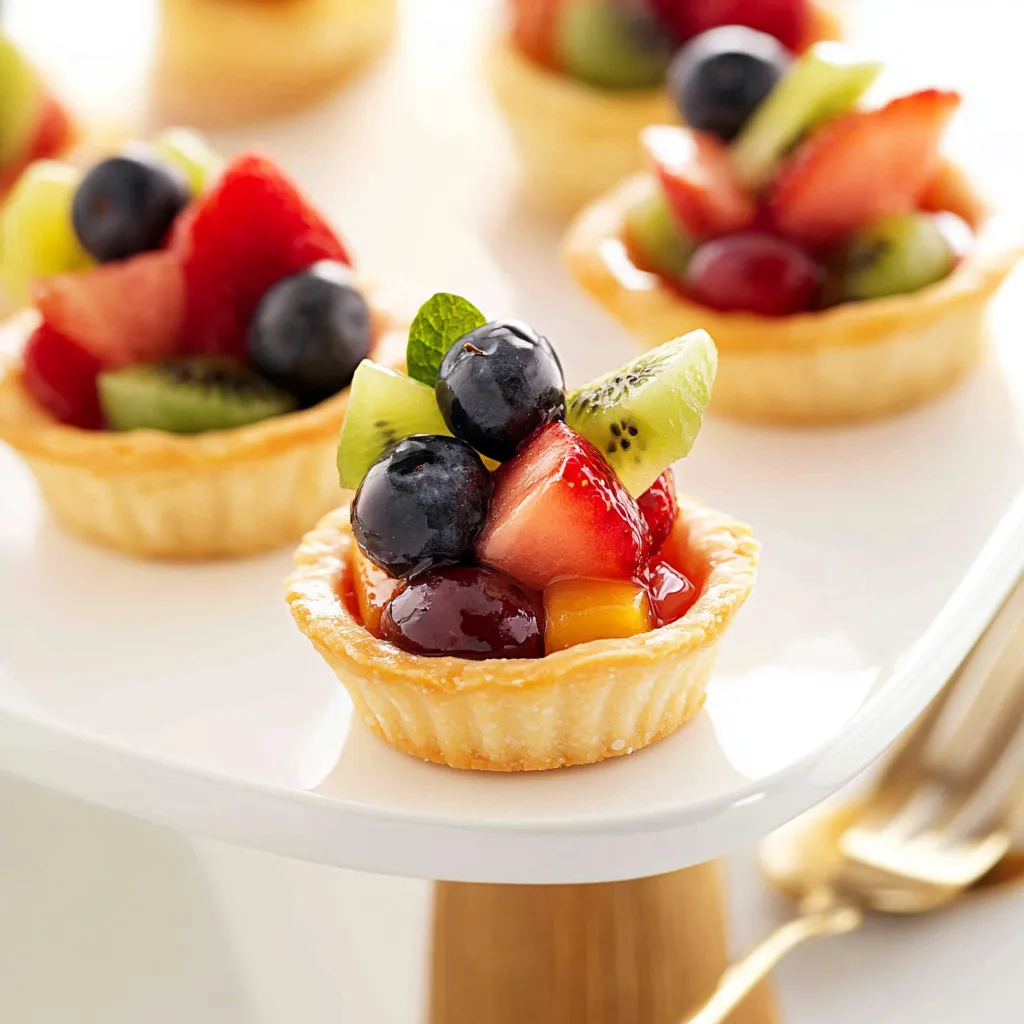
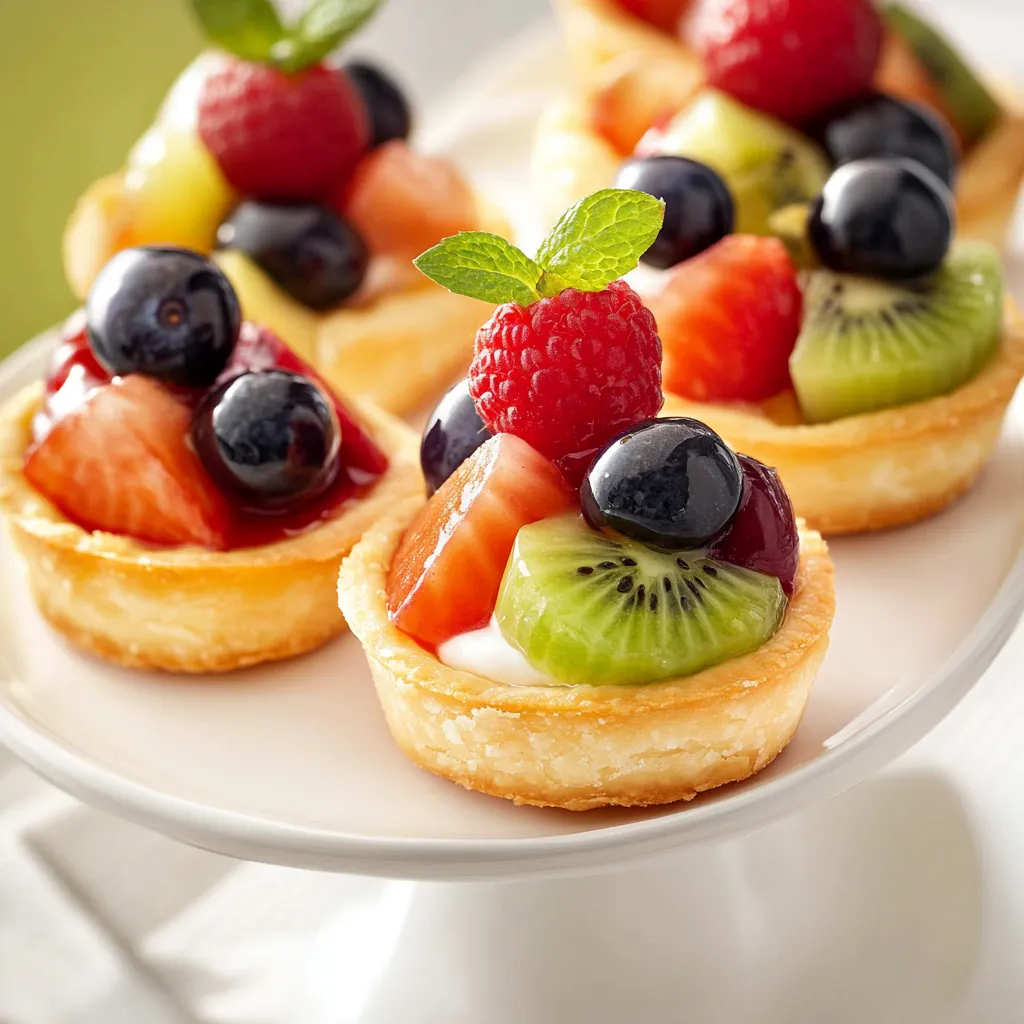
This homemade mini fruit tart recipe brings bakery-quality treats right to your kitchen with remarkably little effort. The buttery shortbread crust paired with smooth vanilla filling and topped with colorful fresh fruit creates a dessert that's as impressive to serve as it is delicious to eat.
I first made these mini tarts for my sister's bridal shower and they disappeared faster than any other dessert on the table. The combination of textures from crisp shell to creamy filling to juicy fruit creates such a satisfying bite that guests always think they took much more effort than they actually did.
Ingredients
- All purpose flour: Forms the base of our buttery shortbread crust providing structure while remaining tender
- Granulated sugar: Adds just enough sweetness to complement the fruit without overwhelming
- Fine sea salt: Enhances all the flavors bringing depth to the buttery crust
- Cold unsalted butter: Cut into pieces creates those perfect flaky layers in the crust when baked
- Milk: Helps bind the dough together while keeping it tender
- Homemade vanilla pudding: Creates a luxurious creamy base for the fruit
- Fresh assorted fruit: Brings color vibrance and natural sweetness
- Apricot preserves: Creates that professional bakery shine and helps preserve the fruit freshness
Step-by-Step Instructions
- Make the Dough:
- Add flour sugar salt and butter to your food processor and pulse until the mixture looks like coarse crumbs with small pea sized pieces of butter still visible. This typically takes about 8 to 10 pulses. Gradually add milk just until the dough comes together when pressed between your fingers. The dough should be pliable but not sticky or wet.
- Form the Tart Shells:
- Use a cookie scoop to portion the dough evenly into the mini muffin tin wells aiming for about 1 tablespoon per cavity. Press the dough firmly against the bottom and up the sides using your fingers or the back of a measuring teaspoon. Make sure the thickness is even throughout to ensure consistent baking. Chill the formed shells for at least 30 minutes to prevent shrinkage during baking.
- Bake the Shells:
- Preheat your oven to 350°F while the shells are chilling. Prick the bottom of each shell several times with a fork to prevent them from puffing up during baking. Bake until the edges turn a light golden brown which should take between 13 to 16 minutes. Watch carefully as they can go from perfect to overdone quickly. Cool completely in the pan before attempting to remove.
- Assemble the Tarts:
- Gently remove cooled shells from the pan using a small offset spatula. Fill each shell with a generous teaspoon of vanilla pudding spreading it evenly. Arrange your prepared fruit on top in an attractive pattern. If using the optional glaze mix apricot preserves with a teaspoon of water microwave briefly and brush delicately over the fruit for a professional shine.
 Save
Save
My grandmother taught me the secret to perfect tart shells is keeping everything cold and working quickly. She would chill her mixing bowl butter and even the flour before starting. Her fruit tarts were legendary in our family and I still think of her every time I make this recipe especially when using her favorite raspberry and kiwi combination.
Make Ahead Options
The beauty of this recipe lies in its flexibility for preparation. The tart shells can be baked up to two days ahead and stored in an airtight container at room temperature. They maintain their crisp texture surprisingly well. The vanilla pudding filling can be made up to three days in advance and kept refrigerated. For best results prepare your fruit the day of assembly as cut fruit tends to release juices and lose its vibrant appearance over time. With these components ready assembling the tarts takes just minutes before serving.
Troubleshooting Tips
If your tart dough feels too dry when mixing add milk just a few drops at a time until it comes together. Conversely if it feels sticky add a small amount of flour. For removing baked shells from the pan let them cool for about 10 minutes before attempting removal. If they stick gently run a thin knife around the edges. To prevent soggy bottoms especially if preparing in advance consider brushing a thin layer of melted white chocolate inside the cooled shells to create a moisture barrier between the crust and filling.
Seasonal Variations
These mini tarts shine with different seasonal fruit combinations throughout the year. In spring showcase strawberries kiwi and blueberries. Summer calls for peaches cherries and blackberries. Fall brings opportunities for thinly sliced apples poached with cinnamon and cranberries. Winter tarts can feature citrus segments pomegranate arils and persimmons. Consider arranging the fruit in patterns that highlight the season like flower shapes for spring or star patterns for winter holidays.
Frequently Asked Questions About Recipes
- → What types of fruit work best for these mini tarts?
Fresh fruits like berries, kiwi, grapes, cherries, and small diced peaches or strawberries work wonderfully. Their vibrant colors and flavors enhance the appeal and taste of the tarts.
- → Can I make the tart shells ahead of time?
Yes! You can bake the tart shells in advance and store them in an airtight container at room temperature for up to 2 days.
- → How do I ensure the tart dough comes together properly?
Start by pulsing the flour, sugar, salt, and butter until the mixture resembles coarse meal. Add milk slowly and stop once the dough holds together without being wet.
- → Should the fruit be glazed on top?
Glazing is optional but adds an attractive shine and mild sweetness. Mix apricot preserves with water and gently brush it over the fruit for a polished finish.
- → How long can the assembled tarts be stored?
Assembled tarts are best served the same day. However, you can refrigerate them for a few hours before serving if necessary.